With passkeys, you no longer need to use a password to log into supported websites. Here’s how to use them with password manager NordPass.
One drawback of password managers is you still have to rely on passwords by creating and storing one for every website account. And though the password manager is protected by a master password, your accounts can still be vulnerable if you use a weak or simple password.
With passkeys being touted and implemented by several tech companies, one option for going passwordless is to turn to NordPass with its new Passkeys feature. Using NordPass Passkeys, you can access supported website accounts using a passwordless option, no longer requiring you to create or store a password.
Jump to:
What are passkeys?
As set up by NordPass and other providers, passkeys are a relatively new type of authentication. Instead of you using a traditional password to access a system, website or account, passkeys are automatically generated to sign you in seamlessly behind the scenes. A passkey is generated when you sign up for an account, and it consists of two separate cryptographic keys: one public and the other private. The public key is registered with the website, while the private key is stored on your device. When you try to log in, the two keys are paired to authenticate your identity and grant you access.
Adopting passkey technology and standards from the industry group FIDO Alliance, such major players as Apple and Google have already set up passkey options for their users. And more recently, password managers have been getting into the act to generate and store the passkeys for supported website accounts.
How do passkeys work with NordPass?
NordPass passkeys currently work with the company’s desktop application and Chrome, Edge and Firefox desktop browsers via extensions. Support for Safari on macOS will pop up later in the year, according to NordPass. As for mobile devices, the OS vendors need to provide APIs for support. Google has said it will allow third-party apps to manage passkeys on Android in August 2023; Apple has promised the same support for this fall.
Passkey support is still in its nascent stage, so it’s available only at certain websites; however, support will expand as more sites integrate the technology. On its Passkeys FAQ page, NordPass lists many of the sites that currently allow you to set up passkeys. Other lists of websites that support passkeys are Passkeys.directory and Keeper Passkeys Directory.
How to set up your NordPass account
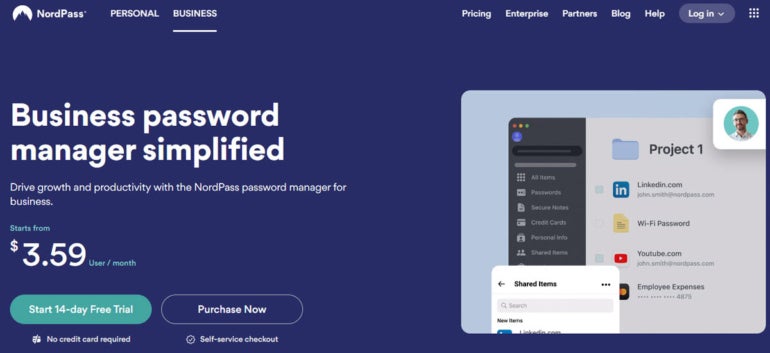
If you don’t have an account with NordPass, browse to the NordPass website. You can sign up for a personal or business subscription. Click the Business button if you wish to set up a business plan. The price starts at $3.59 per user per month with a free 14-day trial (Figure A).
Figure A
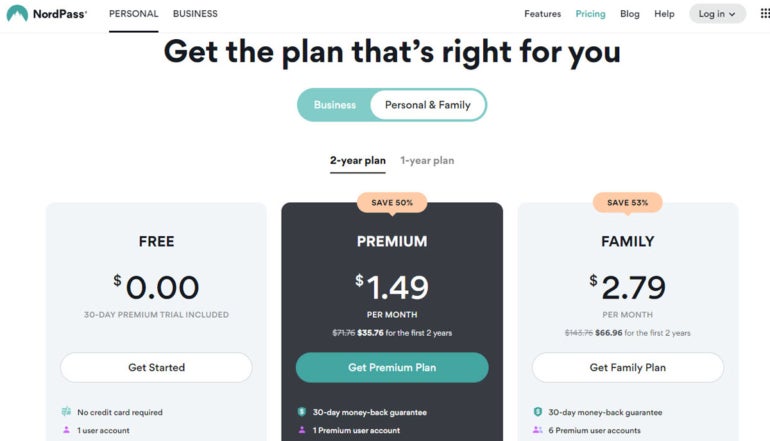
To establish a personal plan, click the Personal button and then click the Check Plans button. Three types of plans are available: Free, Premium at $1.49 per month, and Family at $2.79 per month (Figure B).
Figure B
Click the button for the plan you want, and then follow the steps to set up your account. During this process, you’ll need to create a username, password and a master password. You’ll also be prompted to download and install the NordPass desktop application.
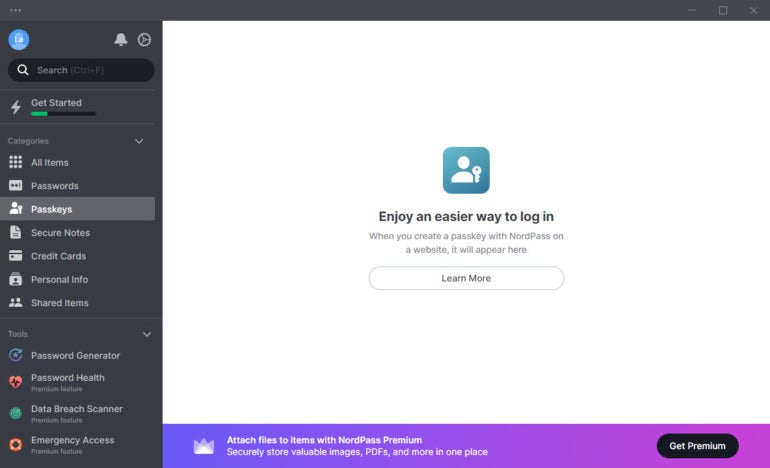
After the setup is finished, the NordPass application launches. Click the entry for Passkeys in the left sidebar. For now, clicking the Learn More button takes you to the FAQ page; after you start generating passkeys, the data for each website account will be stored here (Figure C).
Figure C
How to install the NordPass extension
Fire up your favorite browser to set up the extension for NordPass Password Manager & Digital Vault. You can do this in Chrome, Edge or Firefox in Windows or in macOS.
- For Chrome or Edge, head to the Chrome Web Store and search for NordPass Password Manager & Digital Vault or just follow the direct link to the page. Choose the options to add the extension to the browser and add the extension’s icon to the toolbar.
- For Firefox, go to the Firefox Browser Add-ons page and search for NordPass Password Manager & Digital Vault or follow the direct link to the page. Select the option to add the extension to Firefox and then pin its icon to the toolbar.
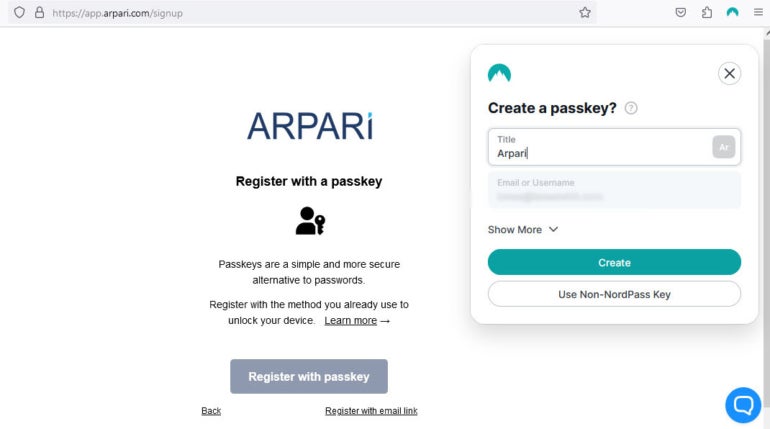
How to create a passkey for a new account
From here, let’s say you want to set up a new account with a website that supports passkeys:
- Browse to a passkey-supported site from the NordPass list of supported sites or from one of the other lists referenced above.
- Select the option to create a new account and enter your email address.
- Choose the option to use a passkey. A NordPass window should appear and offer to set up the passkey.
- Click the Create button (Figure D). You’re then signed in with your new account using the generated passkey.
Figure D
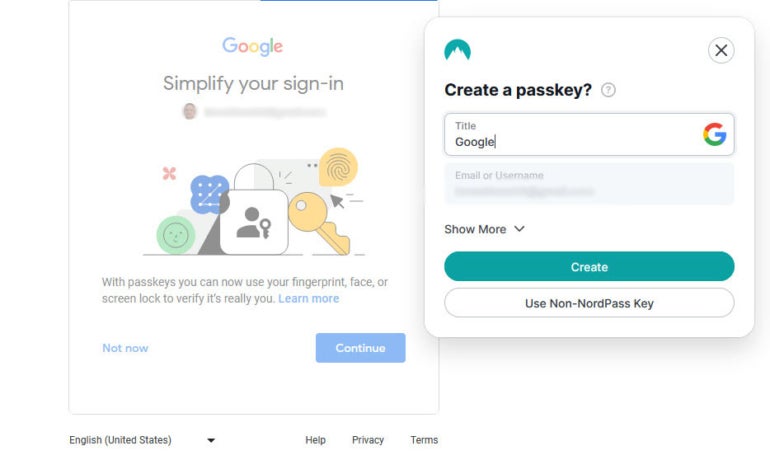
How to create a passkey for an existing account
Next, maybe you want to set up a passkey for an existing account for which you already have a password:
- Browse to a passkey-supported site.
- Sign into your account with your username and password.
- A site such as Google will immediately ask if you want to switch to a passkey. For other supported sites, you may have to review your security or password settings for an option to use a passkey. Either way, accept the option to create a passkey.
- The NordPass window pops up and offers to create your passkey. Click Create (Figure E).
Figure E
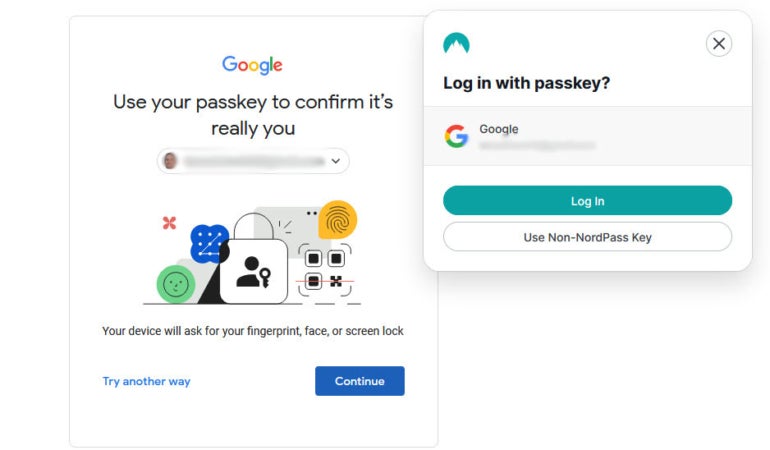
How to log in with a passkey
You can now log into any account for which you’ve created a passkey.
- Browse to the site and enter your username. The NordPass window appears and asks if you want to sign in with your passkey.
- Click the Log In button to sign in (Figure F).
Figure F
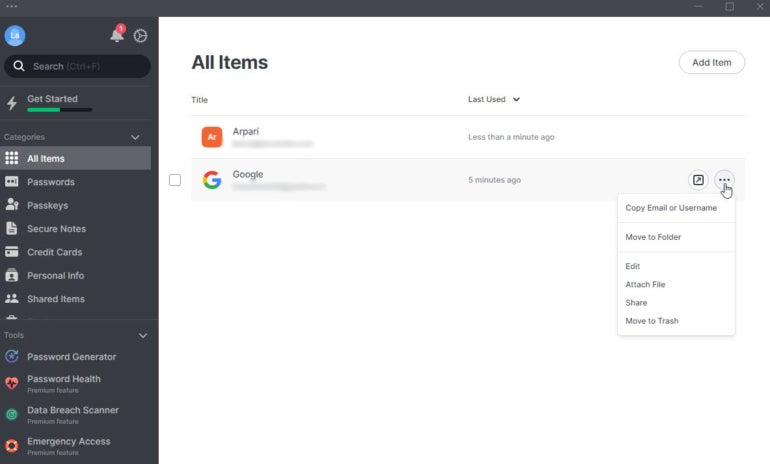
How to manage your NordPass-generated passkeys
You can view and manage the passkeys you’ve created with NordPass:
- Open the NordPass desktop application and click the Passkeys entry to see all your stored passkey-driven accounts.
- Click the Launch Website button at the end of each entry to sign into that site.
- Click the ellipsis icon to display a menu from which you can copy your email address or username, edit the entry, attach a related file to it, share the entry or move it to the trash (Figure G).
Figure G